Data sharing like pictures, videos, contacts, etc. between computer and mobile phone is a common practice. But not many people know about the AirDrop feature of Apple devices that facilitates data transfer with the help of AirDrop from Mac to iPhone, or from iPhone to MacBook. It is irrespective of what data you want to move between the two devices, but the process stands out as the most comfortable amongst all the possible ways.
The AirDrop is a unique feature by the Apple Company that only supports its products. It means that data can only be transferred among iDevices or Mac computers, and to answer the user’s question, “Can I AirDrop from Mac to iPhone,” is yes! It can be done most comfortably. The article may not currently be beneficial to those who have iPhone but not Mac computers, because Apple has not provided an AirDrop application that can work on other computer systems.
Although AirDrop is a highly promoted application, but the hardware conditions and compatibility issues makes users choose a better alternative which is Tenorshare iCareFone. Read the below article to know about how to AirDrop from Mac to iPhone, or how to AirDrop from iPhone to Mac, along with a brief description about Tenorshare iCareFone for situations when AirDrop doesn’t work. But let us first understand what AirDrop is, and the mandatory requirements to make it work.
Part 1. What Is AirDrop?
Mobile phones and computers have specific purposes, but the most basic interconnection between them is data sharing. The best way to secure the mobile data is to move them on a separate hard disk or a PC. AirDrop is a unique feature built in the Apple devices, which facilitates secure data sharing among them. This means file sharing is comfortable with the help of AirDrop from computer to iPhone.
This function works fascinatingly in data movement between the iDevices and Mac systems, which was only possible with other slower methods like USB wire, or Bluetooth. The airDrop was earlier launched as an enabled feature that could move or share data between two MacBooks or two iOS devices. Still, now with “OS X Yosemite,” it is also made available to AirDrop from Mac to iPhone, or vice versa.
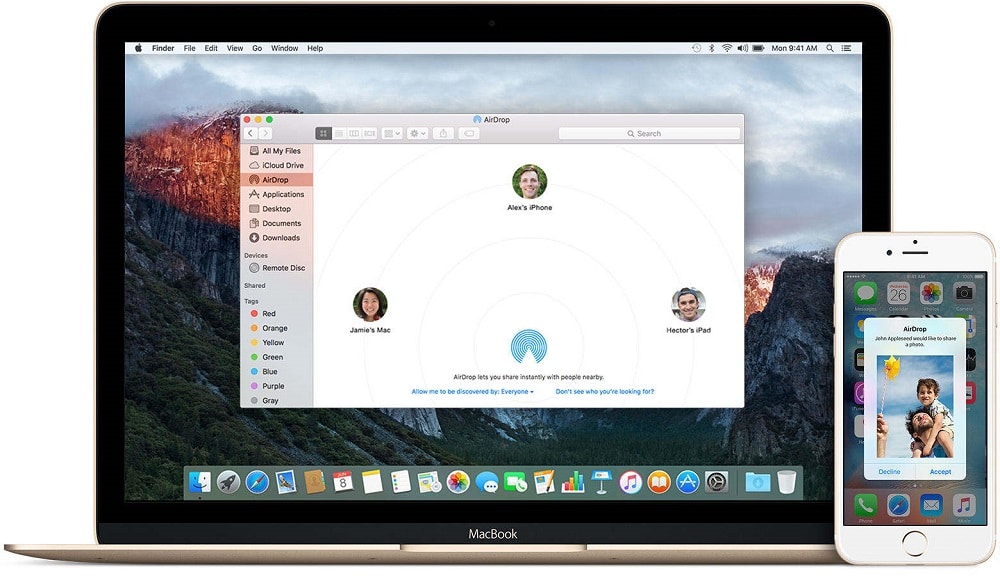
To share data using the AirDrop function, the user does not need to connect the two machines via cable physically. AirDrop works directly using Bluetooth and Wi-Fi technology and instantly locates the devices when they are brought close to each other. Although there are other measures of data transfer, AirDrop is a preferred choice among Apple device owners as it is a faster and secure method.
AirDrop is limitless for file types and infinite for file sharing. It does not restrict on transferring data for any maximum size, and with that, the user has the freedom to move any format or data type from media, contacts, texts, notes, etc. to web-pages, and apps also. For those who have doubts about how AirDrop from MacBook to iPhone or vice-versa works, can stay stress-free as it is safe to use. But before reviewing the process, it is essential to examine other requirements to use AirDrop feature effectively.
Part 2. Before You Start, Check If Your Devices Support AirDrop
The AirDrop facility by the Apple Company is impressive in its operation and attracts iOS and Mac users to include it in their working area. But this may disappoint some users as the service is not available on all the Mac computers and iOS devices. So it is more important in advance to find out the device compatibility and other system requirements, instead of searching “how to AirDrop from iPhone to Mac, or AirDrop from Mac to iPhone.”
AirDrop is not a newly introduced function but was initially launched to make data sharing easier among iDevices with iOS 7, or MacBook with Mac OS X 10.7. With the advancement in the iOS and Mac OS technology, the later versions were upgraded for some specific system configuration, to facilitate the AirDrop from computer to iPhone sharing. The newer version of Mac OS X 10.10 and iOS 8 supports smooth and hassle-free data transfer among each other. Along with that, the system hardware needs to be installed with the advanced Bluetooth (4.0) and Wi-Fi chipset. For more information about the required system configuration to use AirDrop, read below.
MacBook configurations that are suitable for AirDrop from Mac to iOS and vice-versa.
- For MacBook Air: 2012 and higher editions
- For MacBook Pro: 2012 and higher editions
- For iMac: 2012 and higher editions
- For Mac Mini: 2012 and higher editions
- For Mac Pro: 2013 and higher editions
- For 12-inch Retina Display MacBook: 2015 editions
To understand it better, about the system able to support the AirDrop, you can follow one of the given methods.
2.1 Find whether your system supports AirDrop:
Step 1. Go to the Apple Menu on your MacBook.
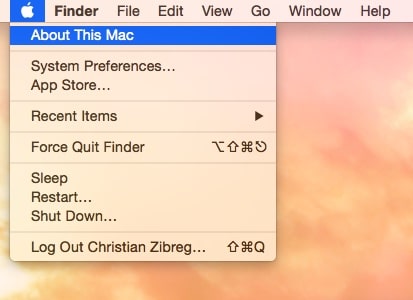
Step 2. Open the “About this Mac” option, which shows the Mac OS details in a window.
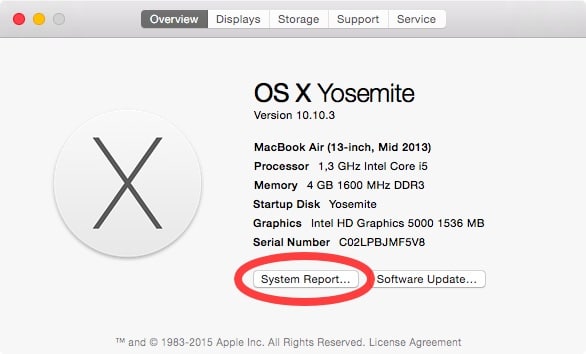
Step 3. Click on the “System Report” button which displays a list of sections on the board as complete system information.
(The System Information can be opened directly by using the Spotlight search results)
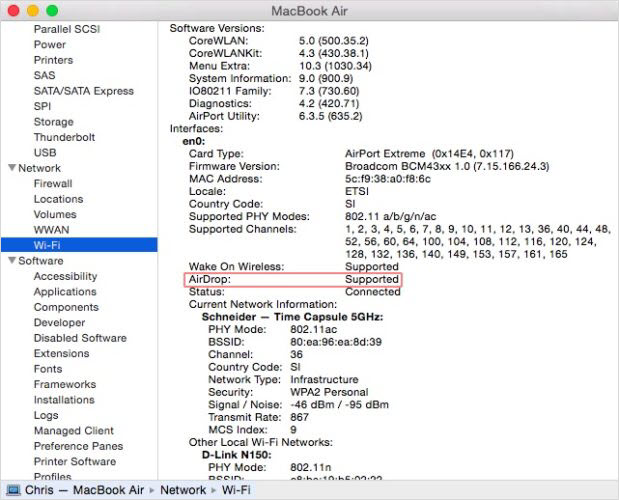
Step 4. Now click on the “Network” section to open the “Wi-Fi” option.
Step 5. There is an “Interface” section in the Wi-Fi option window, where you have to find the AirDrop entry.
If the entry under the AirDrop is “supported,” then you can swiftly use the function over the devices.
2.2. Look for AirDrop support using Finder option:
Step 1. In the Finder option click on the “Go” menu option.
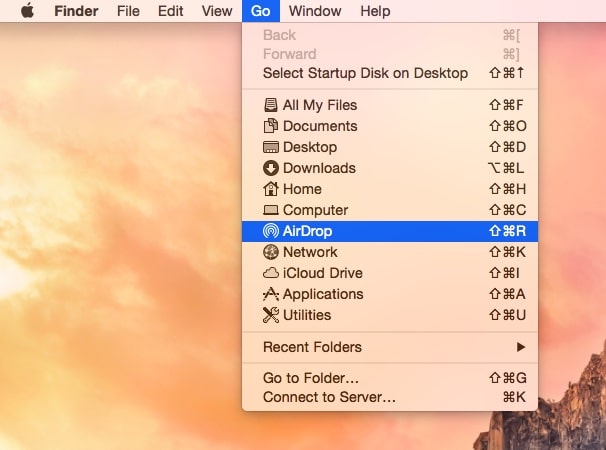
Step 2. Now check in the drop-down list for “AirDrop” option.
If the “AirDrop” option is given, then your computer is compatible with the feature.
Part 3. How To Turn On AirDrop On Mac And iPhone
Finally, when you have discovered that your iOS device and MacBook are compatible to use AirDrop, you are free to share files across the machines. Before moving to the question “how to AirDrop from iPhone to Mac, or how to AirDrop from Macbook to iPhone,” you first need to learn the process to activate the feature on both iPhone, and Mac computer.
3.1. Turn On AirDrop on MacBook
Step 1. Click on the Finder’s Go menu option, and click on the “AirDrop” section.
Step 2. Scroll down below in the page, and click on the “Allow me to be discovered by” option.

Step 3. Now you have to choose “Contacts Only” or “Everyone” option
The above steps will turn on the AirDrop on MacBook
3.2. Turn On AirDrop on iPhone
Step 1. Click the “Settings” menu on your iPhone.
Step 2. Open the “General” section, and click on the “AirDrop” option.
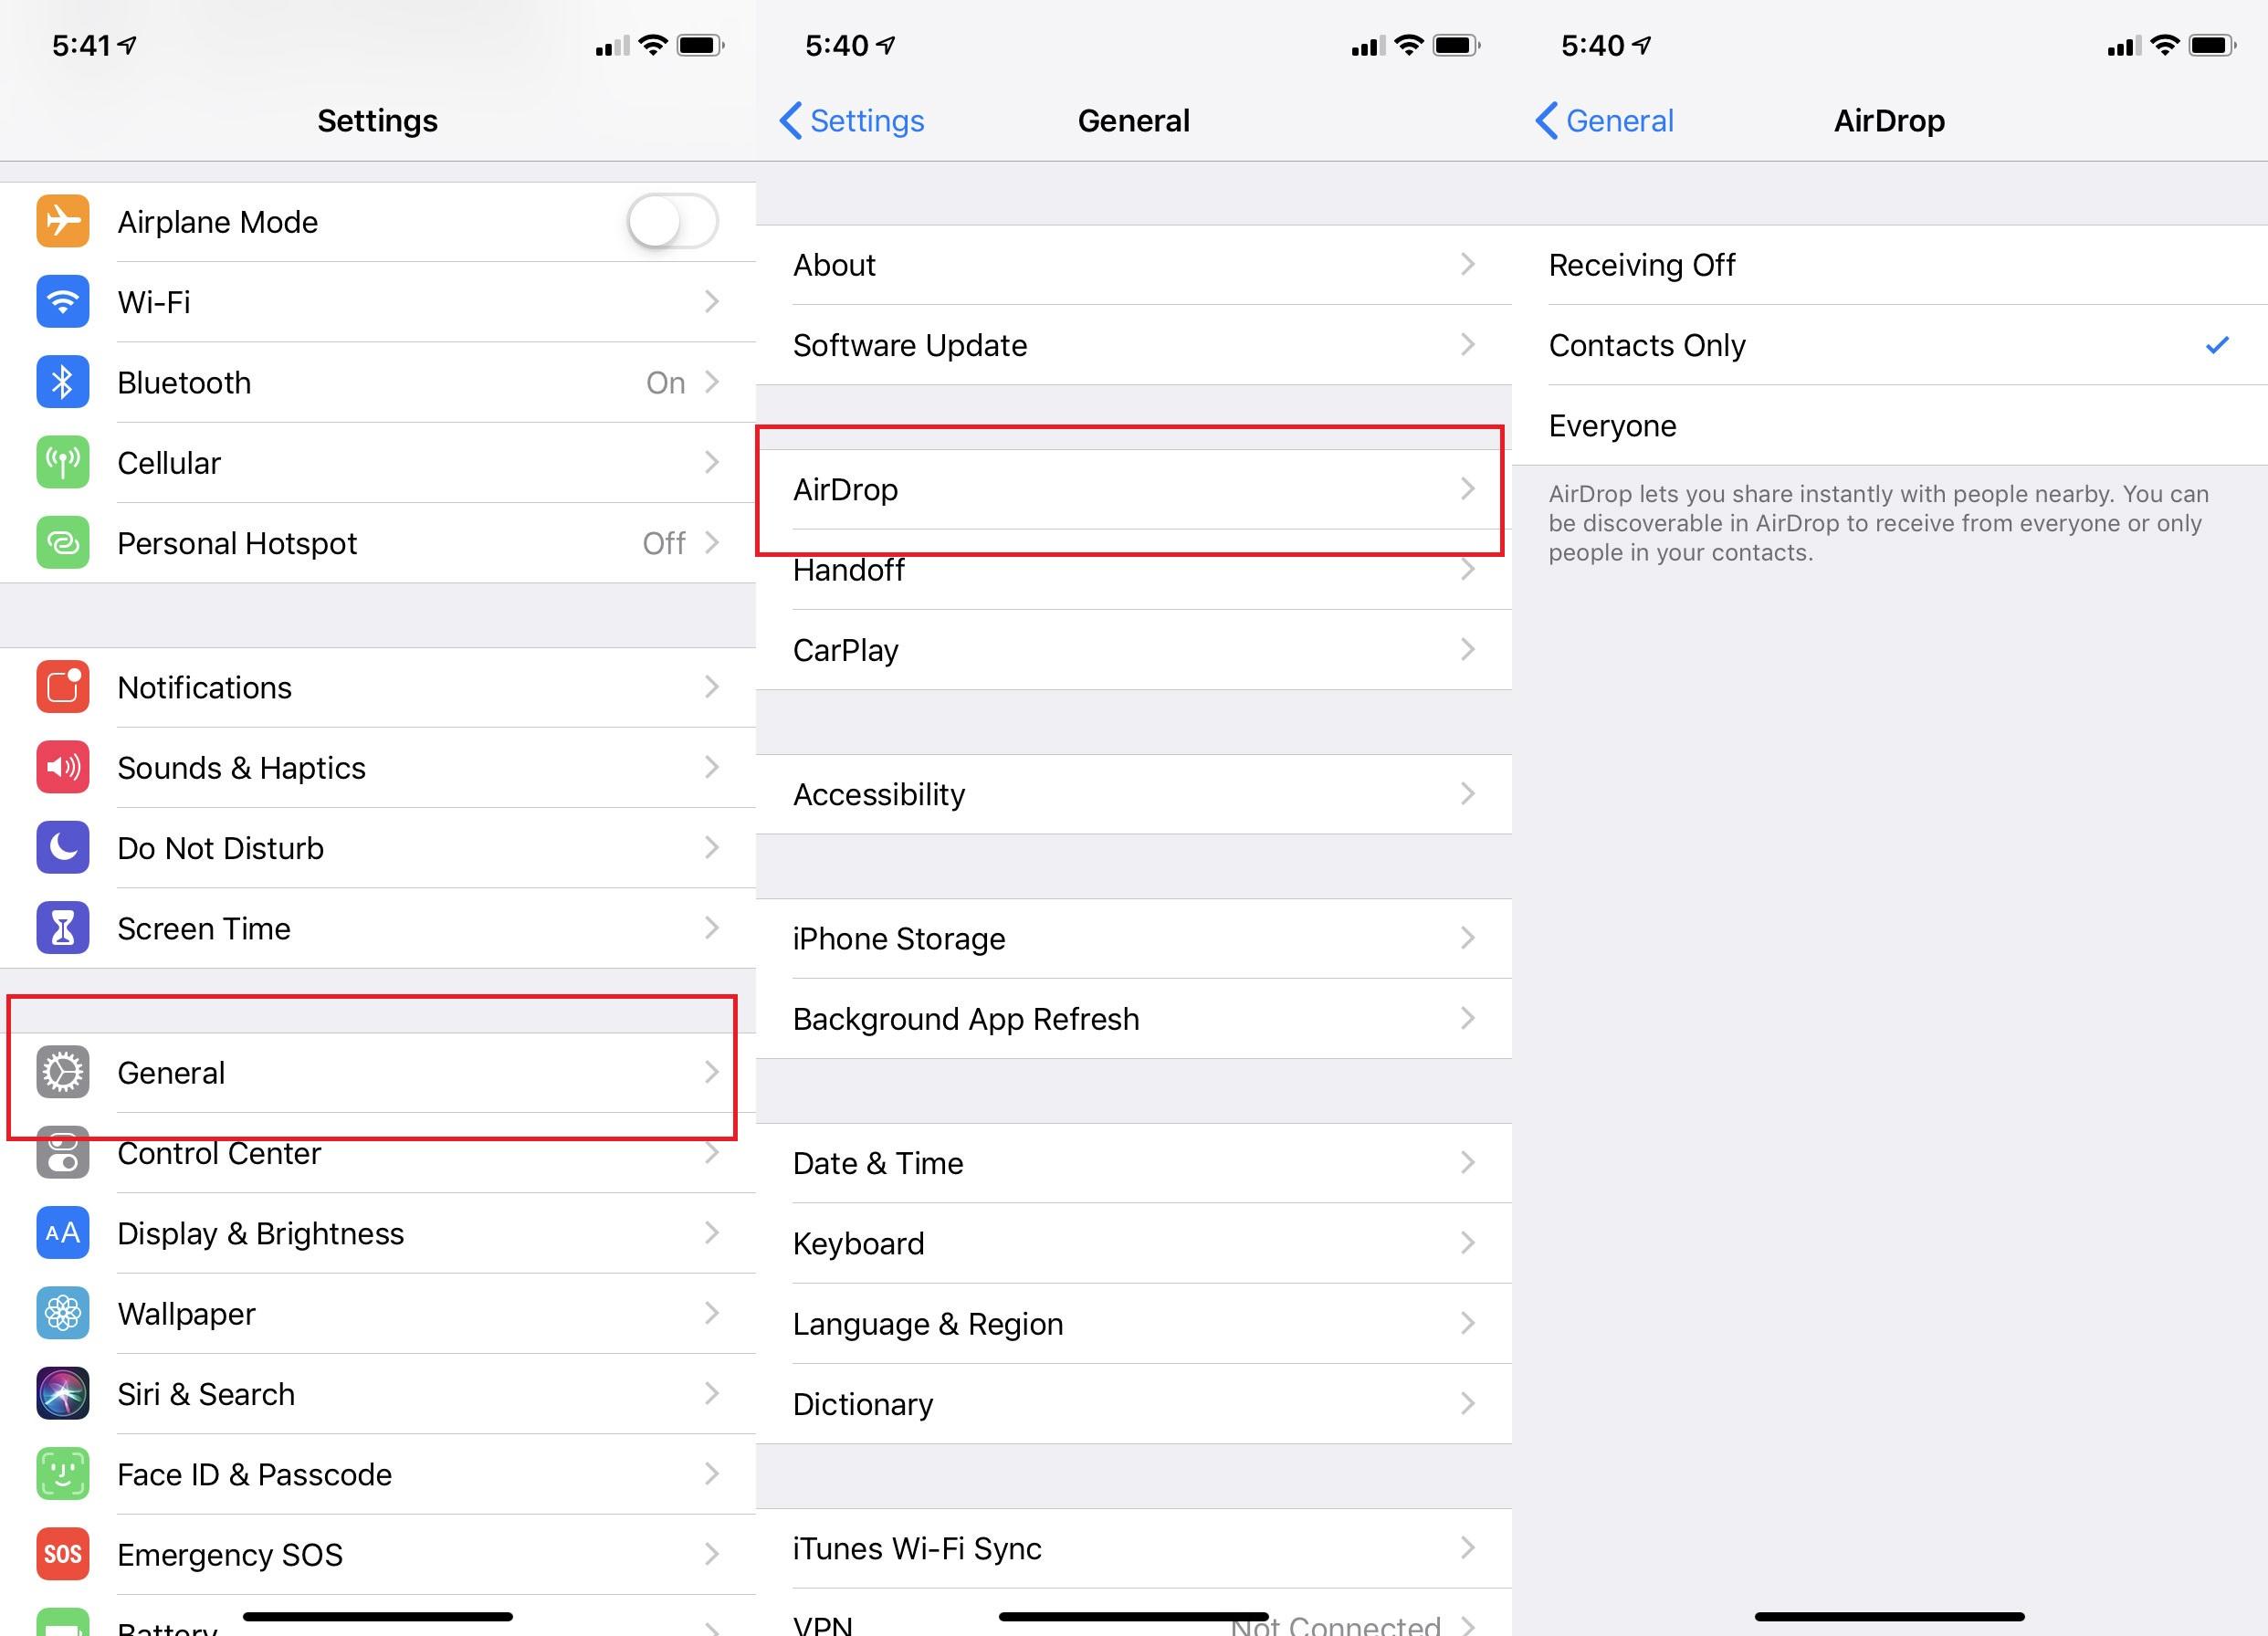
Step 3. Now select the “Contacts only or Everyone” option.
The above steps will turn on the AirDrop on your iPhone.
Part 4. How To AirDrop From Mac To iPhone
Now that you know how to turn on AirDrop on both MacBook and iPhone follow the below-given steps to AirDrop from computer to iPhone.
Step 1. Click on the “Go” menu section of “Finder,” and open the “AirDrop” option.

Step 2. Since the function is already enabled for contacts or everyone, the central column will show all the available devices in range with having AirDrop. You can verify your device name with the Apple ID visible over an icon.
Step 3. You can open another Finder window to check out the files to be shared.
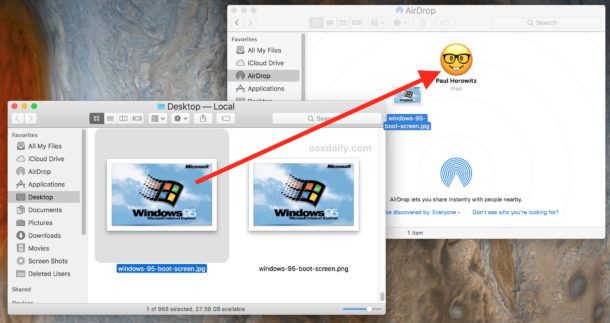
Step 4. Drag the file you want to transfer and drop it over the iPhone icon with the known Apple ID.
Step 5. As the file is being transferred, a blue ring appears over the iPhone icon, which shows the process has initiated.
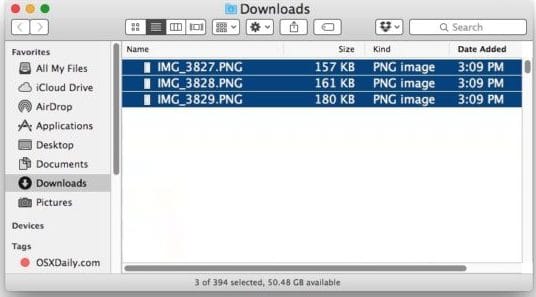
The file transferred can instantly be viewed over the iPhone, as AirDrop takes very less time in file sharing.
Part 5. How To AirDrop From iPhone To Mac
To know how to AirDrop from iPhone to MacBook, follow the below-given procedure.
Step 1. Find the file or document that you wish to transfer on your iPhone.
Step 2. Click on the file-sharing option on the file.
Step 3. Select to share using AirDrop from the given sharing options.
Step 4. You can find your MacBook displayed as the User-Id, in the list. Hit over your device to share the file.
The file is instantly forwarded over the MacBook, and you can immediately check it out, or save it for later reviews.
Part 6. What To Do If AirDrop Doesn’t Work On Your Mac Or iPhone
AirDrop is a smooth and quick, wireless file transfer system for the Apple device users, but it has many drawbacks too. The most basic of them is that all the iOS and Mac devices do not support AirDrop. So a user who needs to transfer data to or from iPhone and MacBook, but one of them is an older version make that is incompatible to AirDrop, then the AirDrop feature is useless for them. There are many Apple users asking questions over the internet “can I AirDrop from Mac to iPhone” or “how to AirDrop from iPhone to Mac.” But they hardly notice that one or both of the machines do not support AirDrop. At times it is seen that the AirDrop stops functioning due to unknown technical errors, although the network connection shows proper signaling.
Tenorshare is a famous software brand that has years of experience in delivering software products for mobile phones, and Operating Systems (Windows/ Mac). Do not worry if you are unable to use AirDrop for unknown reasons, because Tenorshare has devised an expert software solution, iCareFone. It can quickly rectify several iOS technical faults, and also facilitates data transfer among various iDevices, MacBooks and Windows computer.
Tenorshare iCareFone is the best alternate for AirDrop from Mac to iPhone, or iPhone to Mac, as it supports the entire latest and old Apple device, and there is no issue of incompatibility. Data sharing of any file formats like photo, media, contacts, texts, app data, etc., is a most comfortable experience with this tool. Although iCareFone needs a USB connection with the iPhone, iCareFone is always preferred over AirDrop by the majority of Apple device consumers, for making the process easier.
The software is capable enough to resolve complex technical problems on iDevices that might be hindering other services. With these capabilities, iCareFone can help remove any errors on your iPhone that are disturbing the AirDrop from computer to iPhone, or the other way, to let you use the same without any further difficulties. Other than that the tool provides many more useful features which are given below.
>> Get Tenorshare iCareFone <<
Features of Tenorshare iCareFone
- It supports all the iOS version up-to-the latest iOS 13, so irrespective of any iDevice that you have, you can use the tool for file transfer.
- It can easily tackle and rectify standard iOS 13 problems that create trouble on the mobile.
- There is no need for Wi-Fi network connection for creating backup.
- The software can most comfortably be downloaded and installed on Windows computers and MacBooks.
- The data can be easily transferred between iPhone and computer with a preview of the files on the software panel and helping the user to share files selectively.
- It helps in moving music files from iPhone to iTunes.
- The WhatsApp data can be backed up and restored to any iOS or Android device.
- There isn’t any problem with file formats as it can transfer any sort of data type.
- The iCareFone can recover data from backups that are earlier made using iTunes.
- It even assists in ads blocking on iPhones.
- Free demo of the tool is available on the website with limited features.
- The Pro version can be purchased for a Monthly, Yearly, or Lifetime basis.
- There is no restriction of iTunes, and pictures can be easily moved to Camera roll if needed.
- The non-purchased files like pictures or music albums can be shared without any problem.
6.1. How To Use Tenorshare iCareFone For File Sharing
The Tenorshare iCareFone is one of the simplest third-party tools available online. It is a reliable software and works efficiently to assist in sharing data across iDevices, and Windows or Mac computers. A free trial edition of the tool is provided on the website to give a brief idea of its working capacity but has limited functionality. To access all the features of the software, the user has to purchase a pro version.
To use Tenorshare iCareFone for iOS data manager or iOS repair, it has to be downloaded and installed over a Windows or Mac computer. The software works fabulously for data sharing, and you will never have to search about how to AirDrop from iPhone to Mac, as this is a self-sufficient software that resolves most of the iPhone concerns. Follow the instructions given below to know how to use it.
Step 1. Launch the Tenorshare iCareFone software on your PC or Mac, and connect the iPhone to it using a USB cable.
Step 2. Just enter the passcode to unlock the device and then select to “Trust This Computer.”
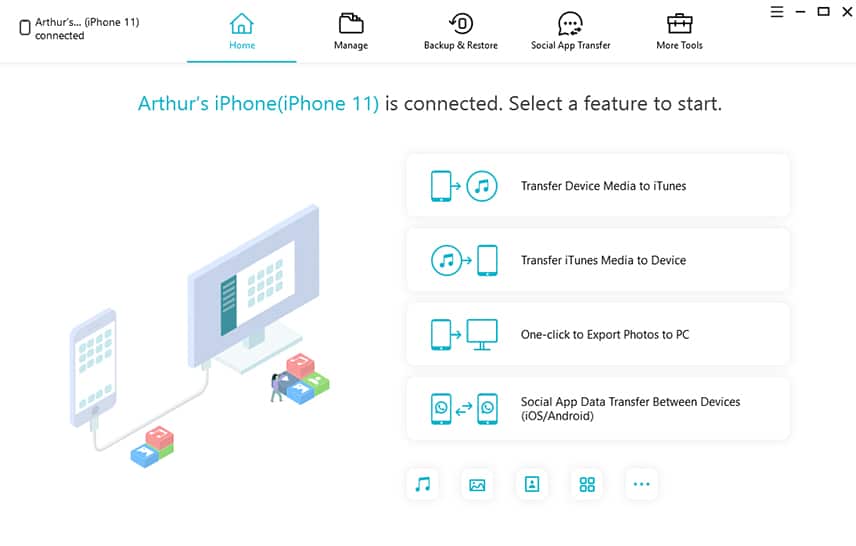
Step 3. Your device gets detected by the tool on the Mac, and you can view the device details on the panel.

Step 4. Click on the “Manage” section to proceed for file sharing.
Step 5. The panel shows the file types like contacts, messages, music, apps, etc. which you can share.
Step 6. In the Manage section, you can either delete the data from your iPhone, or move the data from iPhone to Mac, or from Mac to iPhone.
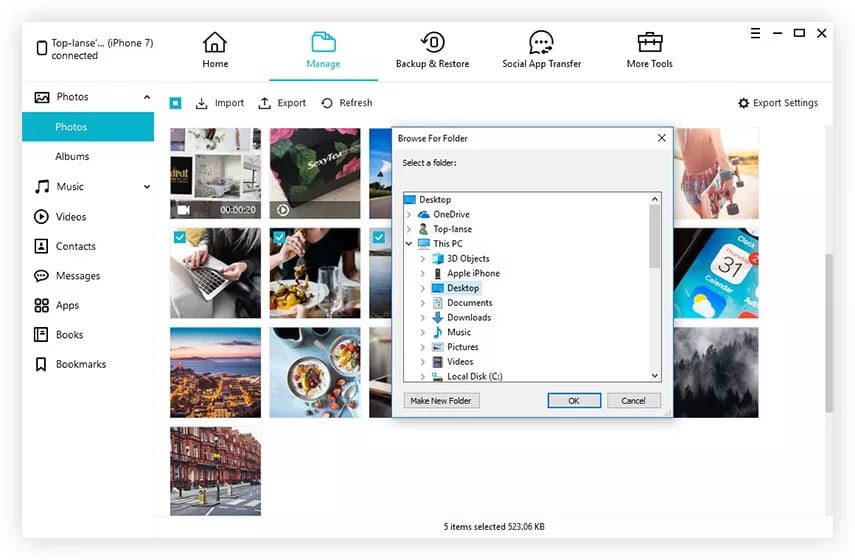
For transferring files from Mac to iPhone
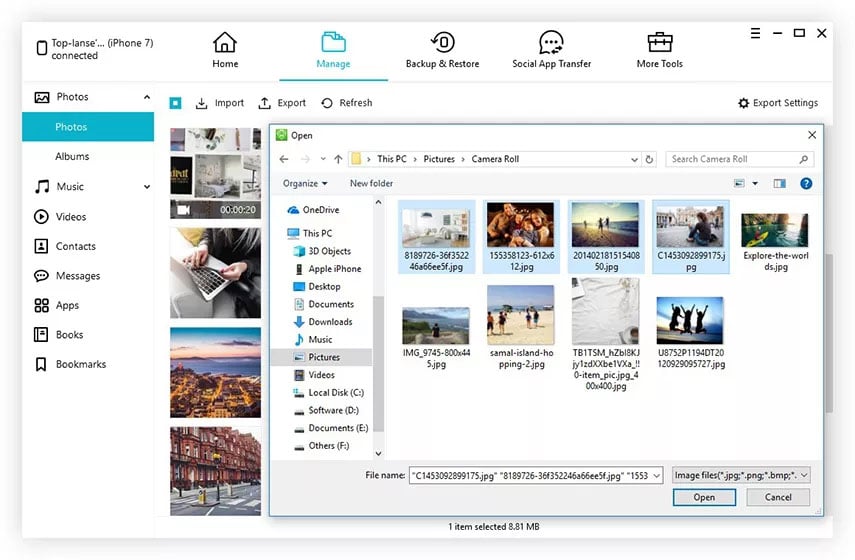
Click on the “Import” button, and you will be forwarded to the browsing page of your Mac, from where you can select the files and instantly move them to your device.
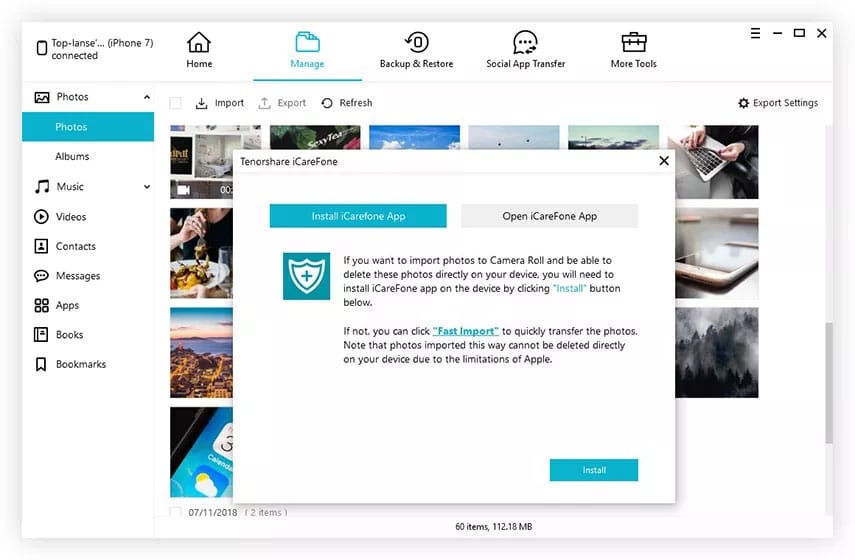
Importing photos to Camera roll will prompt you to install the iCareFone app on the iPhone, which permits to delete those photos later.
6.2. For transferring files from iPhone to Mac
Click on the “Export” button to choose the different files from your device and move them to the Mac on a selected location. It also gives an option to edit the contacts or bookmarks data before moving them, and the changes done will be synced to the iPhone.
Above is a short guide to help you use the Tenorshare iCareFone for file sharing between the mobile and computer. Other features can be used similarly by following the on-screen instructions. Learn more from our Tenorshare iCareFone review here.
Conclusion
Apple has always tried to create interconnectivity among all its products. iTunes is one of the features that helps to connect the iOS device with computers via USB wire. AirDrop is a unique feature launched a few years ago to enable wireless connection between iOS device and MacBooks. People purchasing Apple products keep finding out how to AirDrop from iPhone to Macbook but get irritated to check out its incompatibility with older models.
The AirDrop function often fails to transfer files due to unknown errors that hinder the task. Tenorshare iCareFone is a perfect solution for a convenient data share procedure. It is a secure and trustworthy product which does not have any compatibility issues. It can be used for file transfer between any iOS device and Mac or Windows computer, as well as rectifying typical iOS troubles.

